Testing Simplify3D
I had already heard some rumours about Simplify3D, a new all-in-one 3D printing software program that is said to outperform others. A few days ago Leapfrog sent out a newsletter announcing that the Creatr is now supported in this program and it is now also available in the Leapfrog webshop.
Leapfrog is very enthousiastic: "amazing 3D prints", "unmatched print capabilities" and "make amazing prints, as compared to other software" but before spending € 89,- (ex. VAT) on this software I like to see some results myself.
So I contacted Lucas and he was kind enough to let me use his own license to do some testing before looting my bank account.
Installing the software
Unfortunately there is no test-drive option for this software. After buying a lincense you will receive a key by email and a link where to download the software. The license allows you to install Simplify3D on two computers, there are versions for Windows (32/64 bits), Linux (32/64 bits) and MAC OS-X.
You need to have an active internet connection in order to activate the license on your computer. It is possible to transfer a license to a new PC by deactivating the license so make sure to have a backup in order to restore your license in case your computer crashes ...
I only tested the software on WIndows (64 bits).
Different from other slicers
After installation the quick start manual is opened and it might be a good idea to actually read this manual...
Of course I did not do this ... If I need to read a manual before being able to use this software it's too complex 
Again, it might be a good idea to actually read the manual ... Simplify3D is a bit different from other slicers. Slicers like slic3r or KISSlicer use the simple load, configure, slice work flow. Simplify3D has a different approach as seen in most CAM software packages. After loading the model(s), you specify one or more processes to use.
The simplest flow uses one process to print all available models but if I understand it correctly it is possible to use different processes (with different settings being used) for different parts loaded.
Import a model, Add a process and configure it. Basic configuration of a process is simple: select your printer (select left, right or dual extruder version of the Leapfrog Creatr) and select your material (PLA, ABS, Nylon) and print quality (medium or high). From there on you are guided through a preview and the building process.
I could not resist to change some settings of the process created: Since I always use a raft I added a raft and I changed the layer height from the standard 0.25mm to 0.2mm to match the settings for the models already printed with KISSlicer.
My problem with KISSlicer
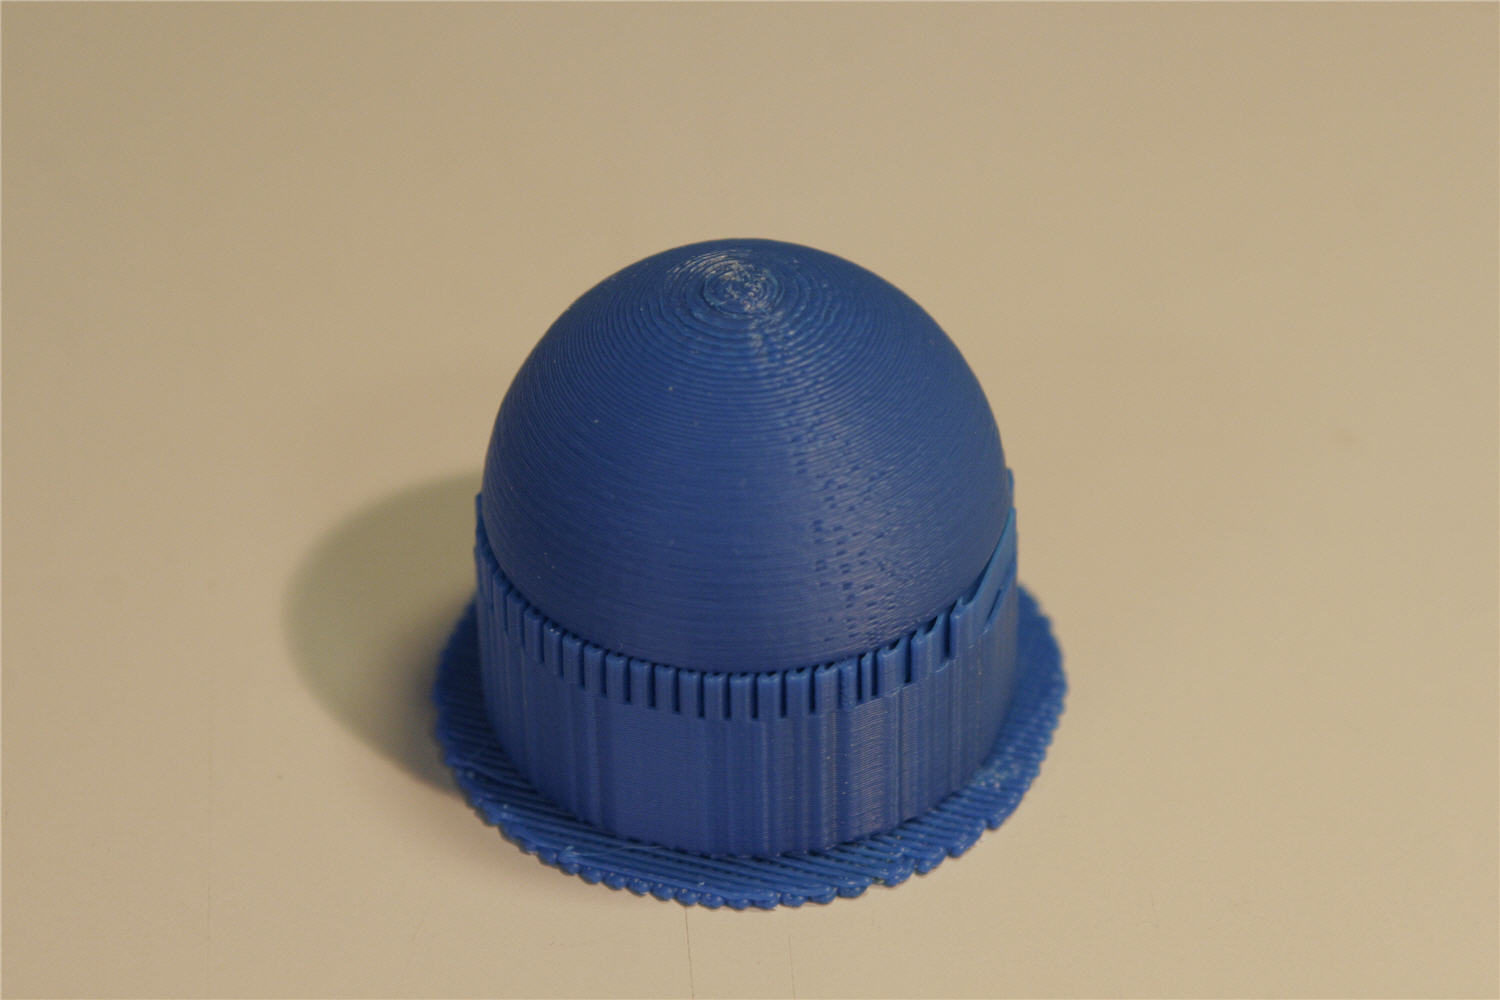
When I created a new grip for my GoPro camera, I had a problem with the surface finish of the half dome at the bottom of the grip. There is a clear line where each layer starts and the top of the dome has a bit of a rough finish (see the left photo below).
Simplify3D does a much better job (right photo below). Perimeters are being printed from inside to outside and the speed is reduced drastically on small layers. This results in an almost perfect finish.
After analyzing the differences in printing between KISSlicer and Simplify3D I changed the KISSlicer settings, resulting in the middle photo. Thanks to the "Jitter" option there is no straight line anymore where all layers start but now each layer is started at a slight different location. This is still visibile as a slight rough band with the remaining part of the perimeter being smooth.
Now look at the right photo again: you might notice that there are small 'blobs' all over the surface finish. I think this is where each layer starts or stops. So not a perfect but an almost perfect surface finish. But with even the improved KISSlicer settings showing a rough top of the dome (but not as rough as the old settings) this is still a very nice improvement.

|
|
|
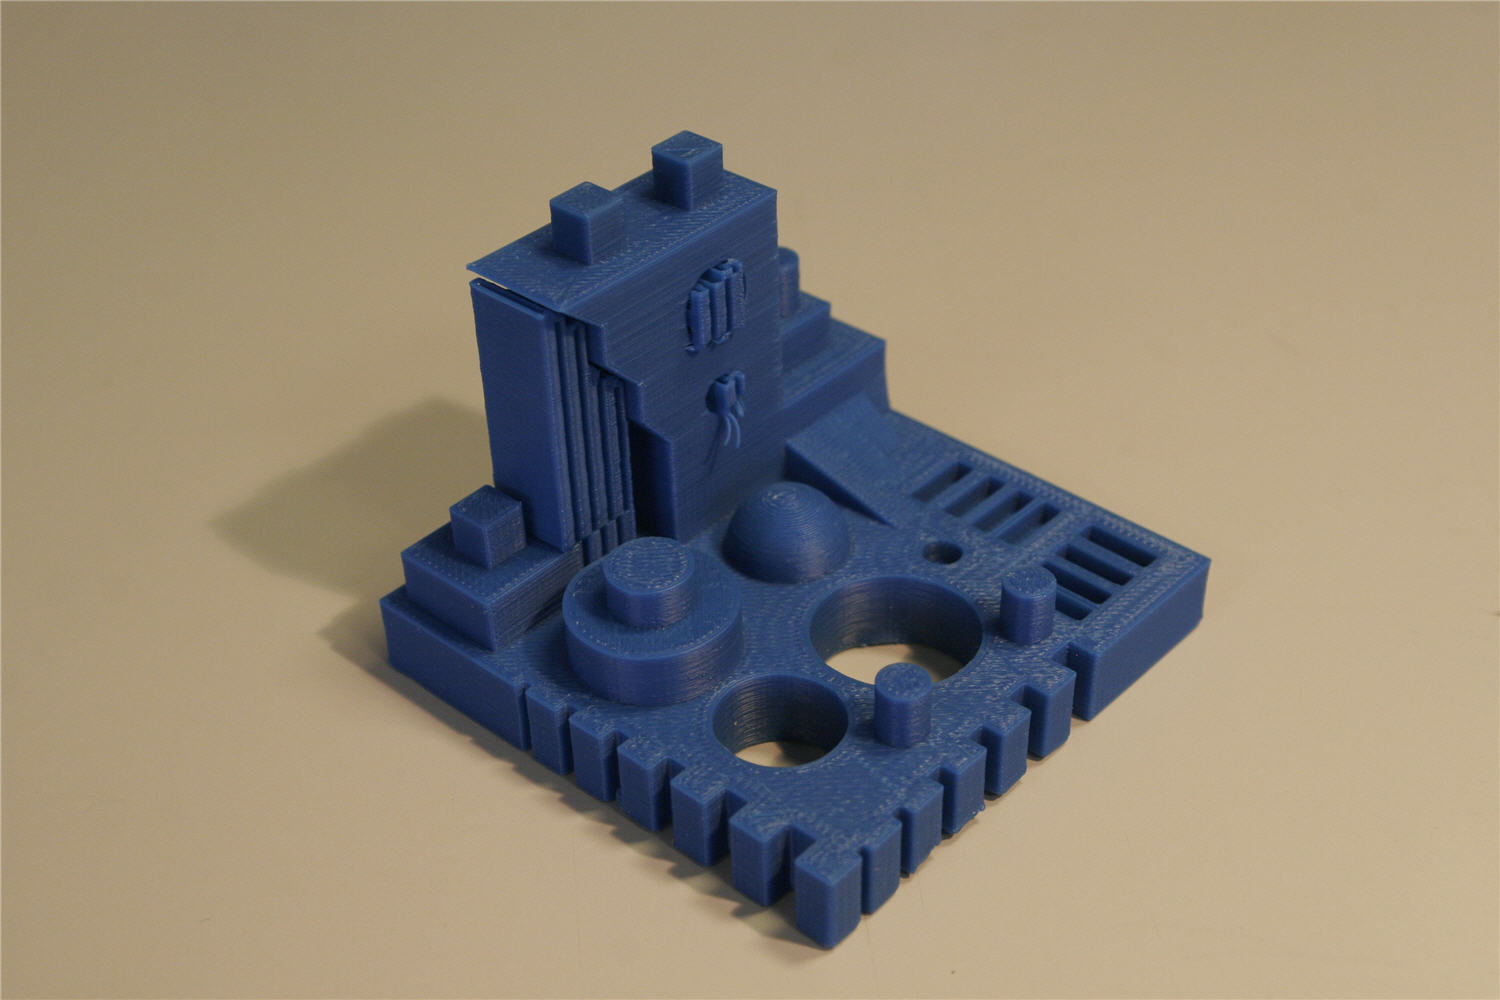
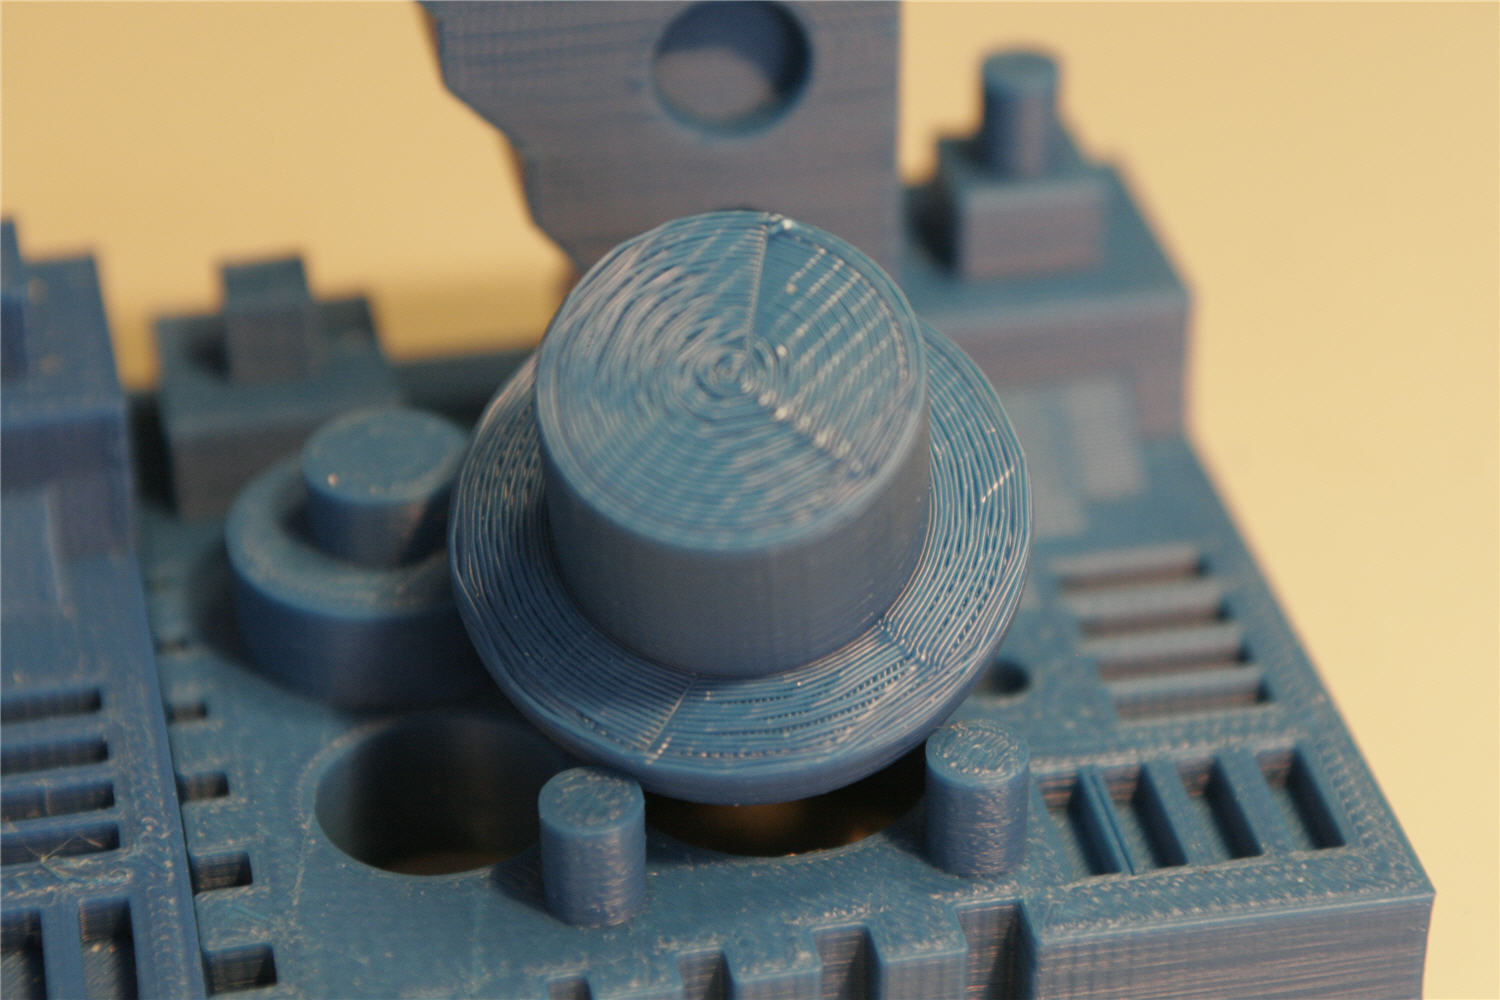
Printing a calibration part
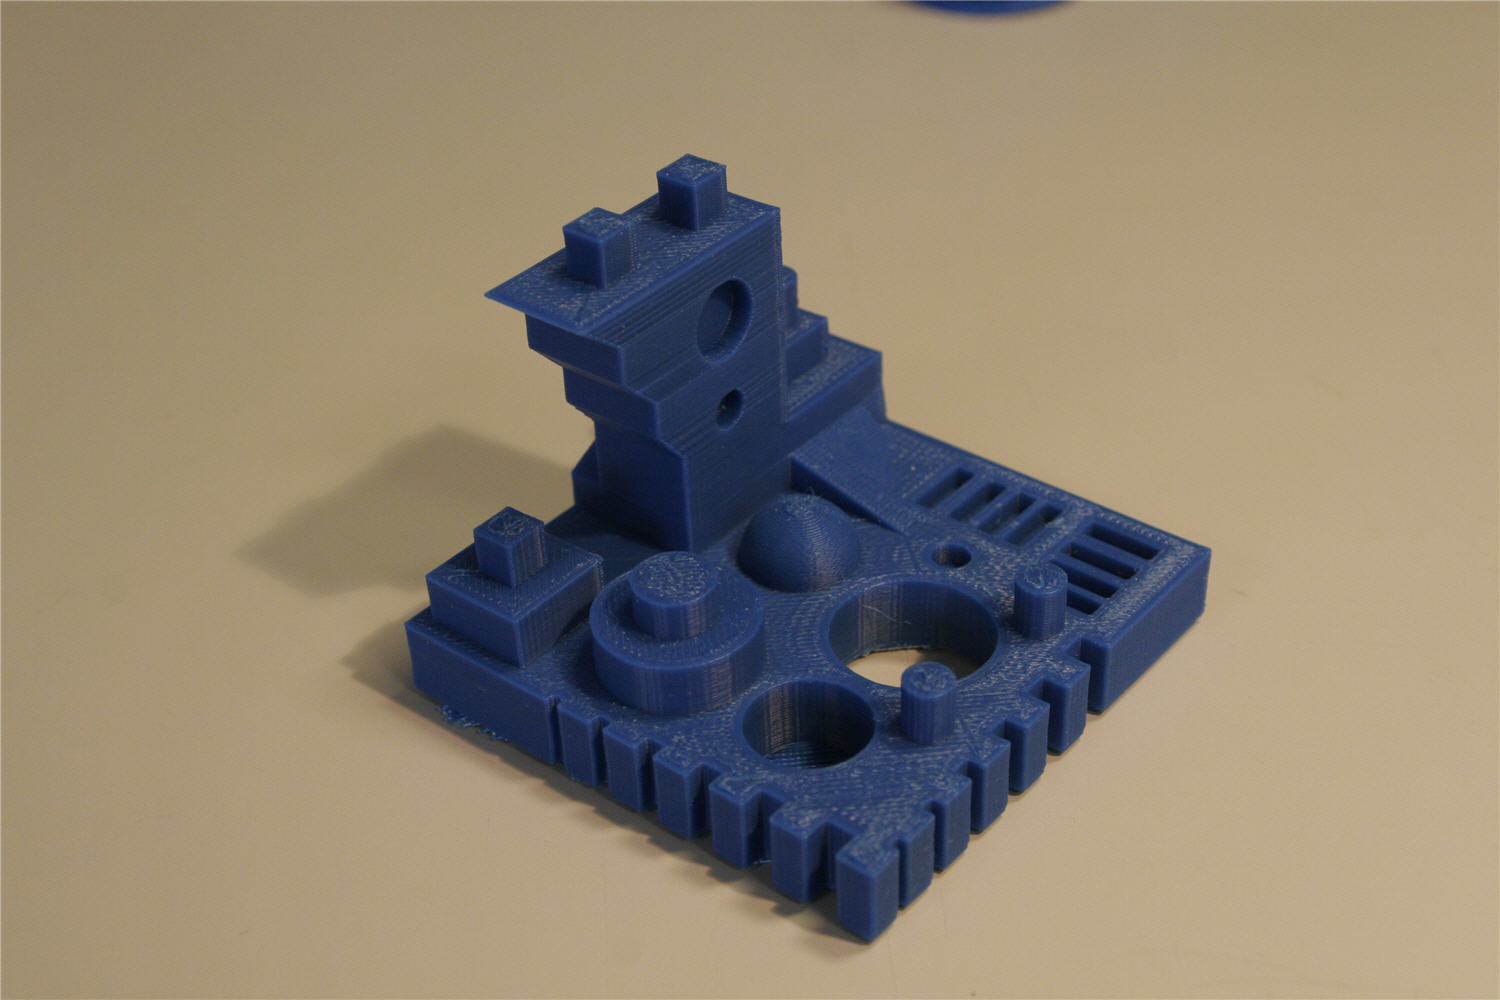
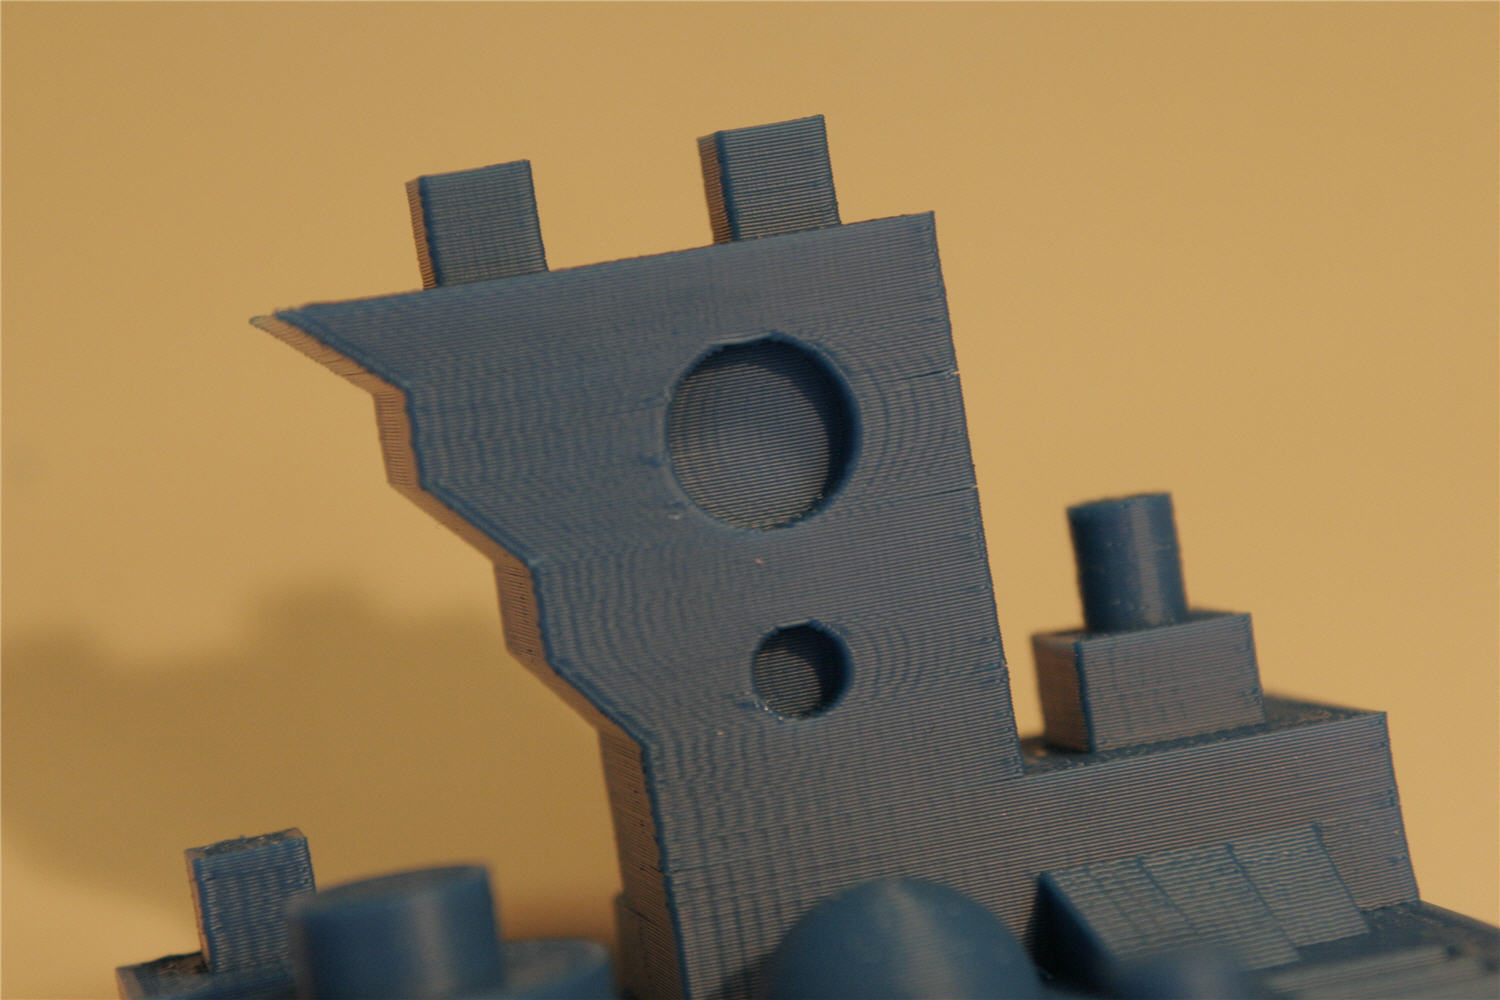
Here is a different part with holes, sloping edges, a small dome, some small details and an overhanging section.
The left photo shows the part printed in KISSlicer with most of the raft already removed. The middle photo shows the first test of this part in Simplify3D using a raft and the right part is my third try without a raft.
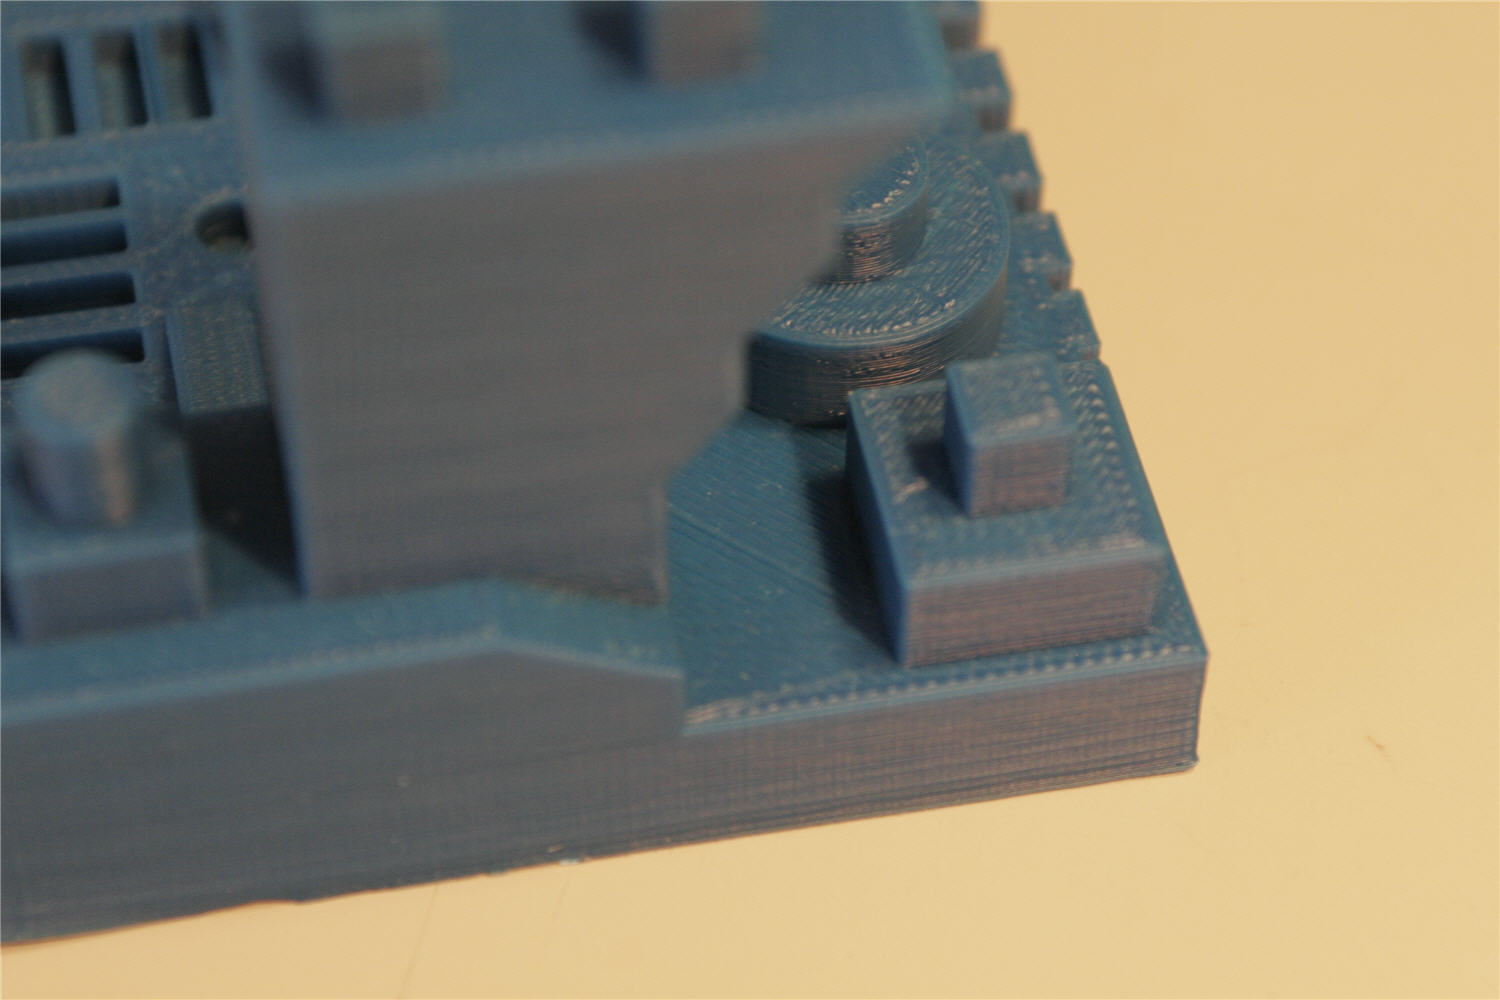
Again a bit of a rough finish on the KISSlicer part. I have the feeling that this used to be not as bad as it is right now but somehow it seems impossible to improve this. On the Simplify part the finish of the horizontal planes is just a bit better but the vertical walls are much better than on KISSlicer. This is most likely a combination of speed settings combines with some special configurations done in the startup G-code (Simplify sets some speed and accelaration parameters that are not used in KISSlicer).
Since my previous part was printed with support, this part also included support structures when printed with Simplify3D. Since there are no steep sloping angles, I printed the KISSlicer version without support.
|
|
|
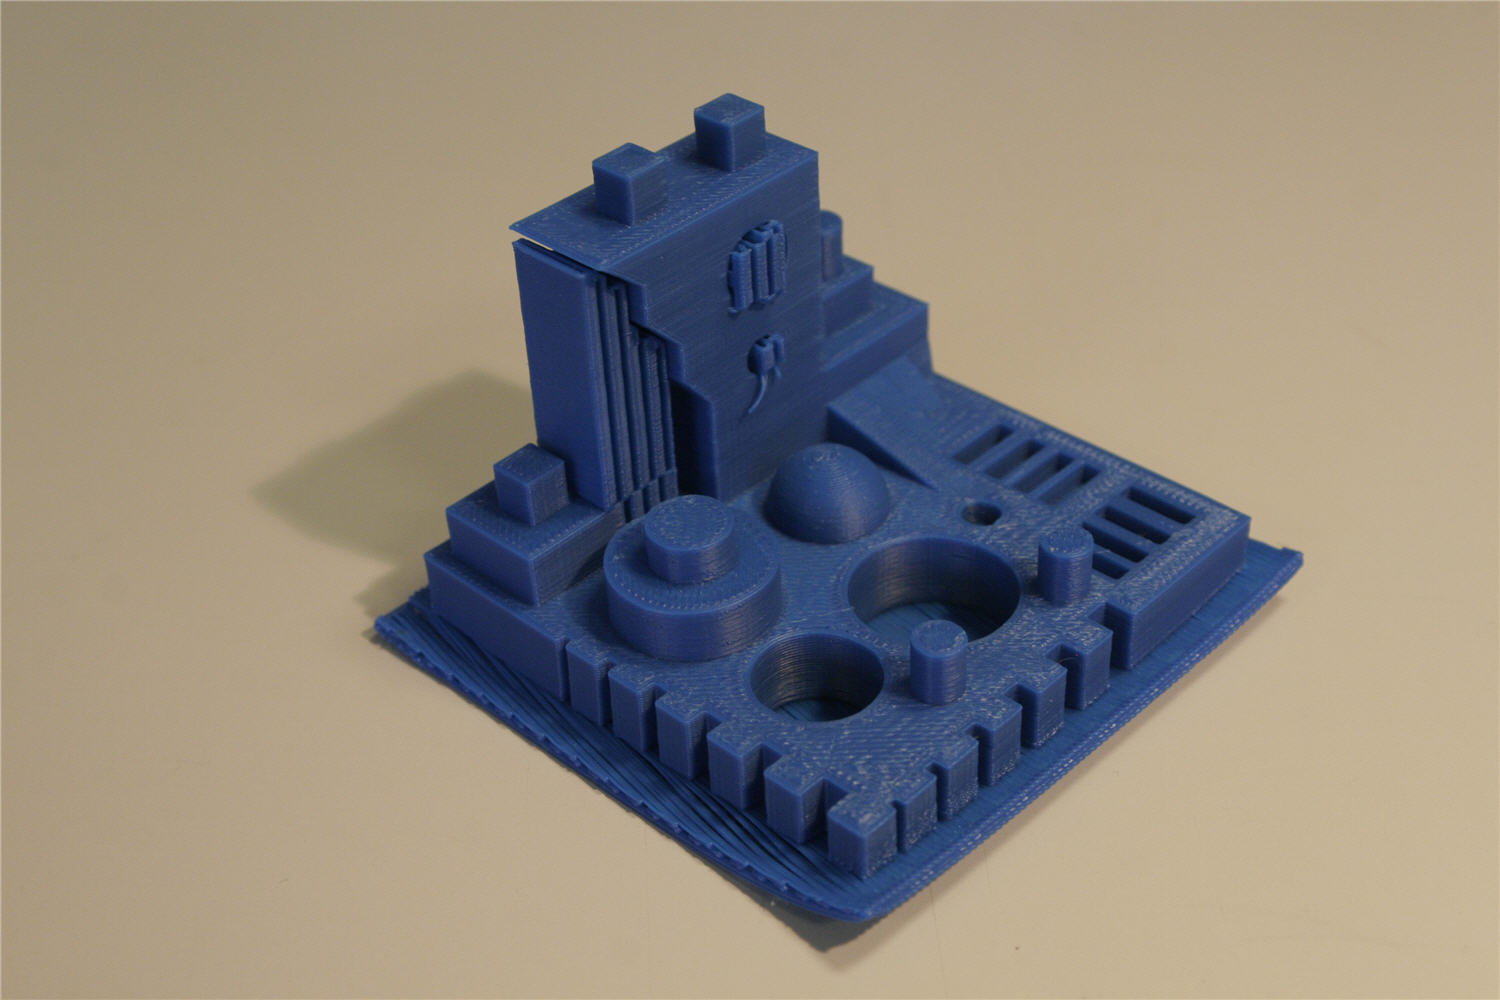
The support structures were removed fairly easy. There are some small support structures being printed in the holes in the vertical column and they snap off as soon as I apply some pressure on them. As you can see in the picture it is almost not visible where the support was used.
|
|
|
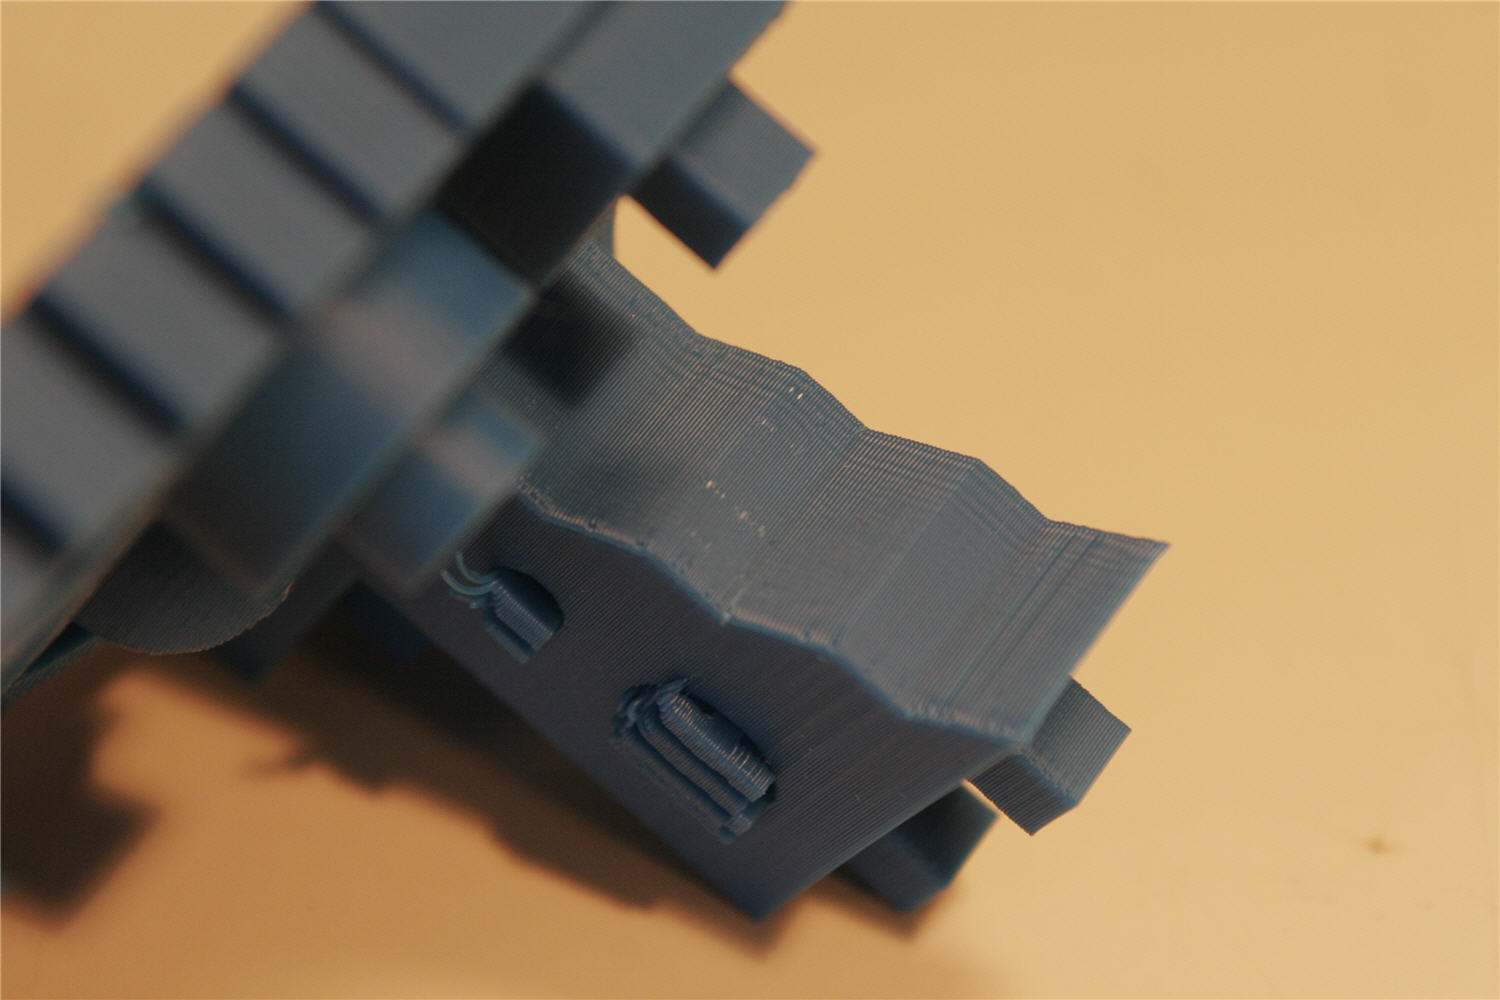
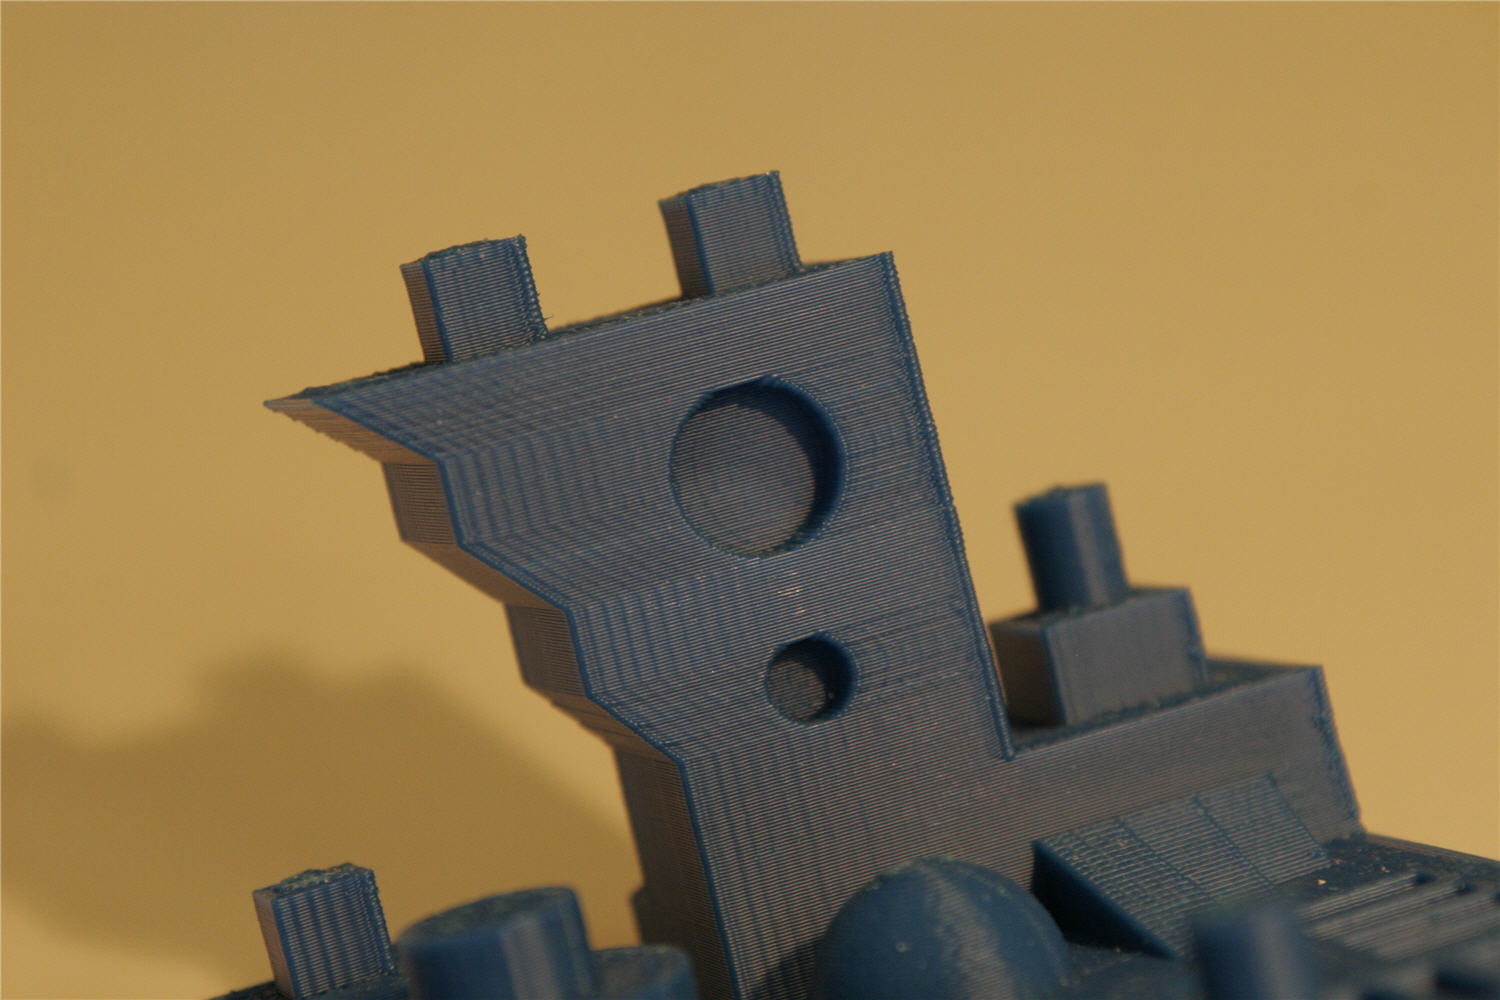
Here are two images with the little holes in the vertical column.
Both Simplify3D (left) as KISSlicer (right) have similar problems with some strange wobbles and was seems like a ghost efect on the holes. The actual wobbles are larger on the KISSlicer part and less visible on the Simplify3D part but the lighting in the photos was set to have this effect visible as much as possible.
Look at the corners of the walls: the KISSlicer part shows a bit of bulging, as if too much material was being extruded. The Simplify3D part gives a much better finish.
Unfortunately also visible is that the Simplify3D part shows some delamination. This may be as simple as a difference in temperatures (I mostly print at 225 or 230°C but Simplify3D is set to 220°C for ABS) or the fact that today is a cold day in my work shop - but this is still something to investigate.
|
|
Removing support structure
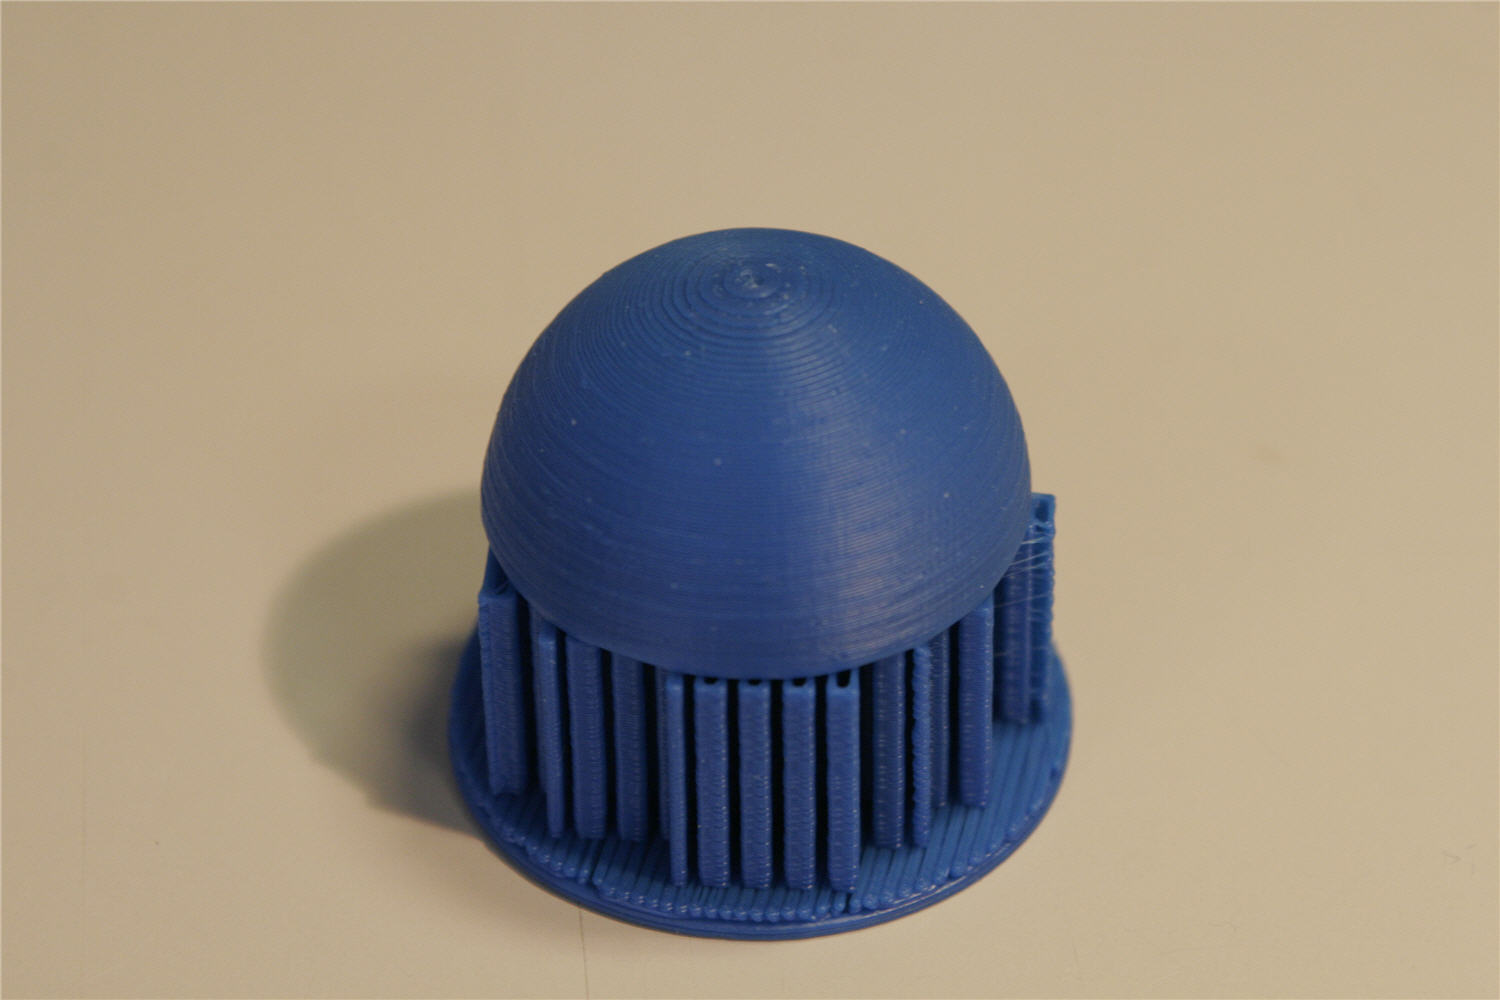
Some final details of the bottom part of the GoPro grip. I still had to remove the support structues on both parts.
The left photo shows the support structures after removing the raft. Somehow Simplify3D prints sn extra layer of support between the raft and the part being printed - this is not standard since the other part does not have this - but this surely helps.
The support from KISSlicer (left) is harder to remove than the support from Simplify3D (right). The Simplyfy3D support was easily removed by hand in a few seconds without leaving any trace whereas I needed a pair of tweezers for the KISSlicer support to be removed from the part.
Have a look at the other two photos as well. The right most photo shows the Simplify3D part, the bottom layer of the dome shows some imperfections. On the KISSlicer part the support is very hard to remove and the last layer of the support is impossible to remove without using sandpaper, file or knife.
Simplify3D outperforms KISSlicer here. Even with the imperfect surface finish, a lot of times I have support structures at places that cannot be reached with the tools needed to remove these remaining bits. So Simplify3D is the better choice for me in this case.
|
|
|
Semi-final conclusion
I have only touched the basic features of SImplify3D.
You can manually add support instead of automatic support generation to optimize material use (and most likely this will also result in a better surface finish of the parts where no support is being printed). You can change settings during printing (e.g. increase layer height in sections of the model where less detail is needed) or even use different settings for different objects being printed at the same time.
But which is the best slicer:
- KISSlicer is free or just $ 42,- for the Pro license to unlock all potentials of dual head printing
or - Simplify3D: € 89,- (ex. VAT) for a license for the full Creator suite
This all depends on what your budget and requirements are.
- If you are on a low budget, go for the free KISSlicer version (but if you can, buy a Pro key to support further development of KISSlicer).
- If you are looking for the fastest and easiest way to print and finish your models, then Simplify3D is the best choice. It's slicer is a few times faster than KISSlicer, it has a very good preview of the generated code and it's all-in-one solution just works.
- If the budget allows it and you are looking for high quality prints, just buy Simplify3D.
After a few tries you'll get the hang of it and you will get more fun (and quality) from 3D printing.
There are still some drawbacks on Simplify3D:
- The raft is not that good and this surely needs to change. It qould be good to have some extra parameters to tweak the raft to my needs.
- The machine control panel has too many tabs. I want a separate log view with error messages that is not hidden in a different tab when the jogging panel is visible.
- A 3D live plot during printing would be nice.
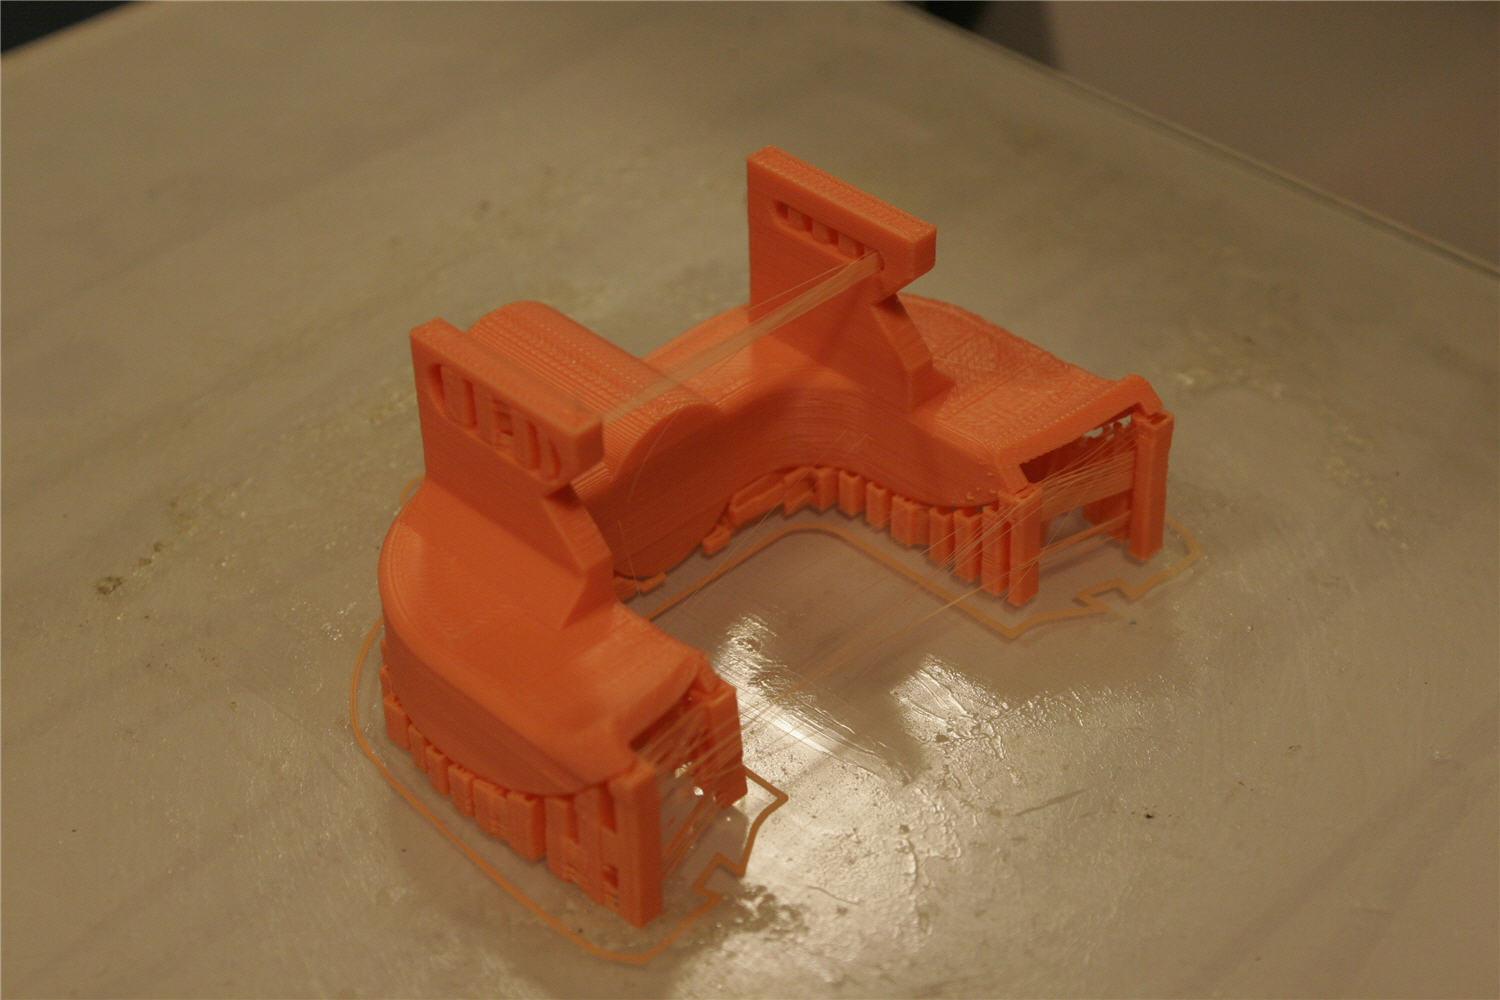
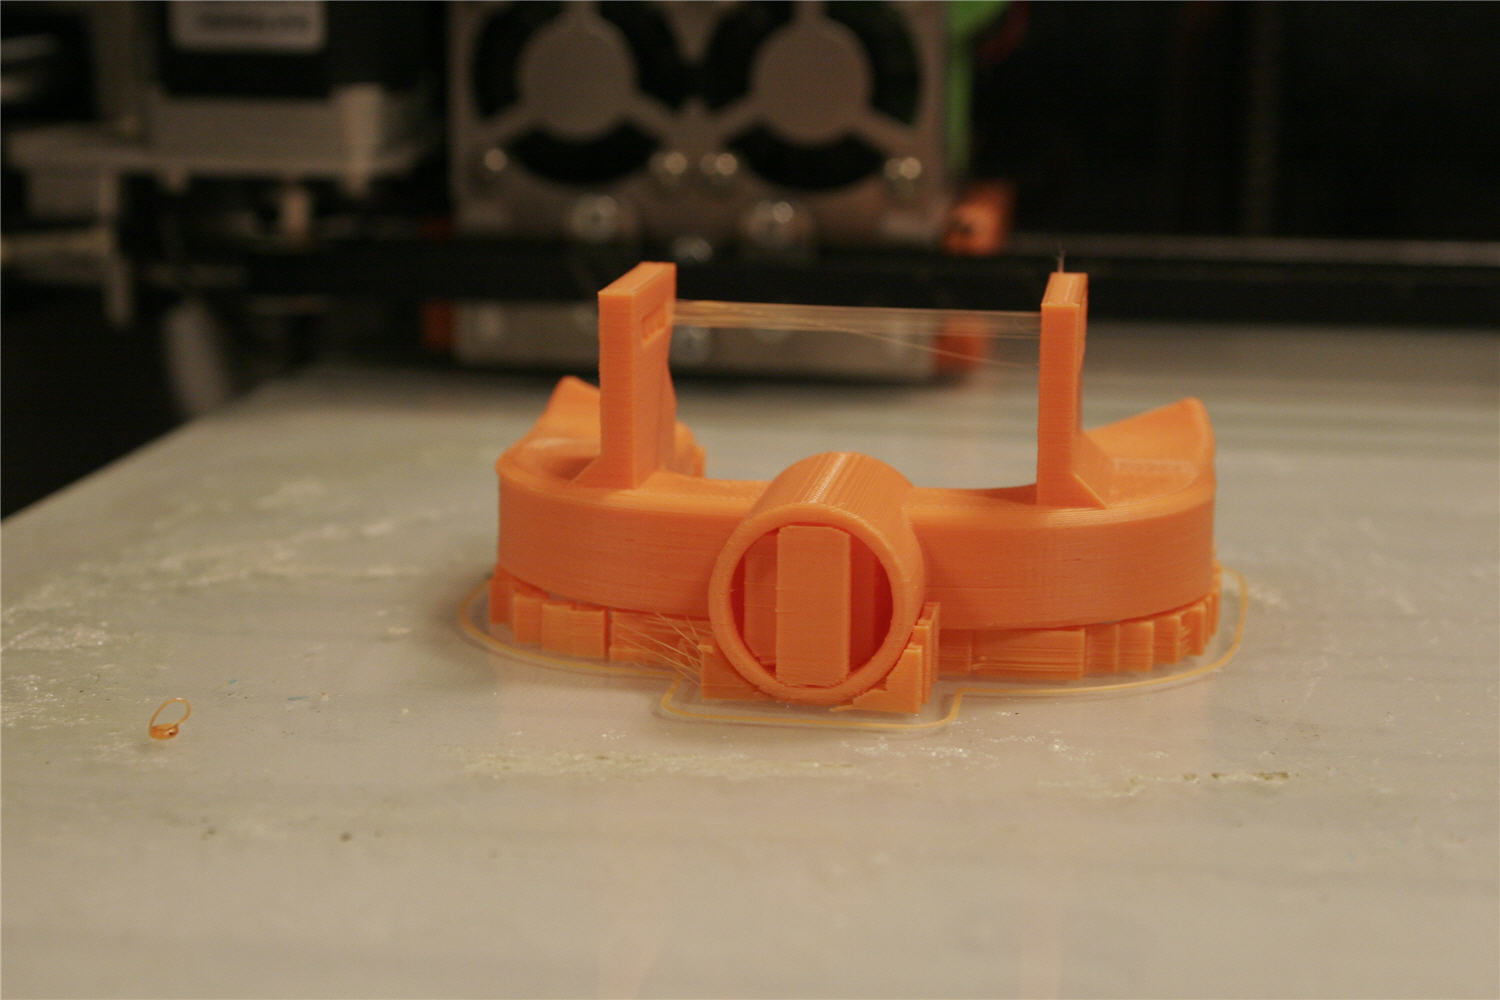
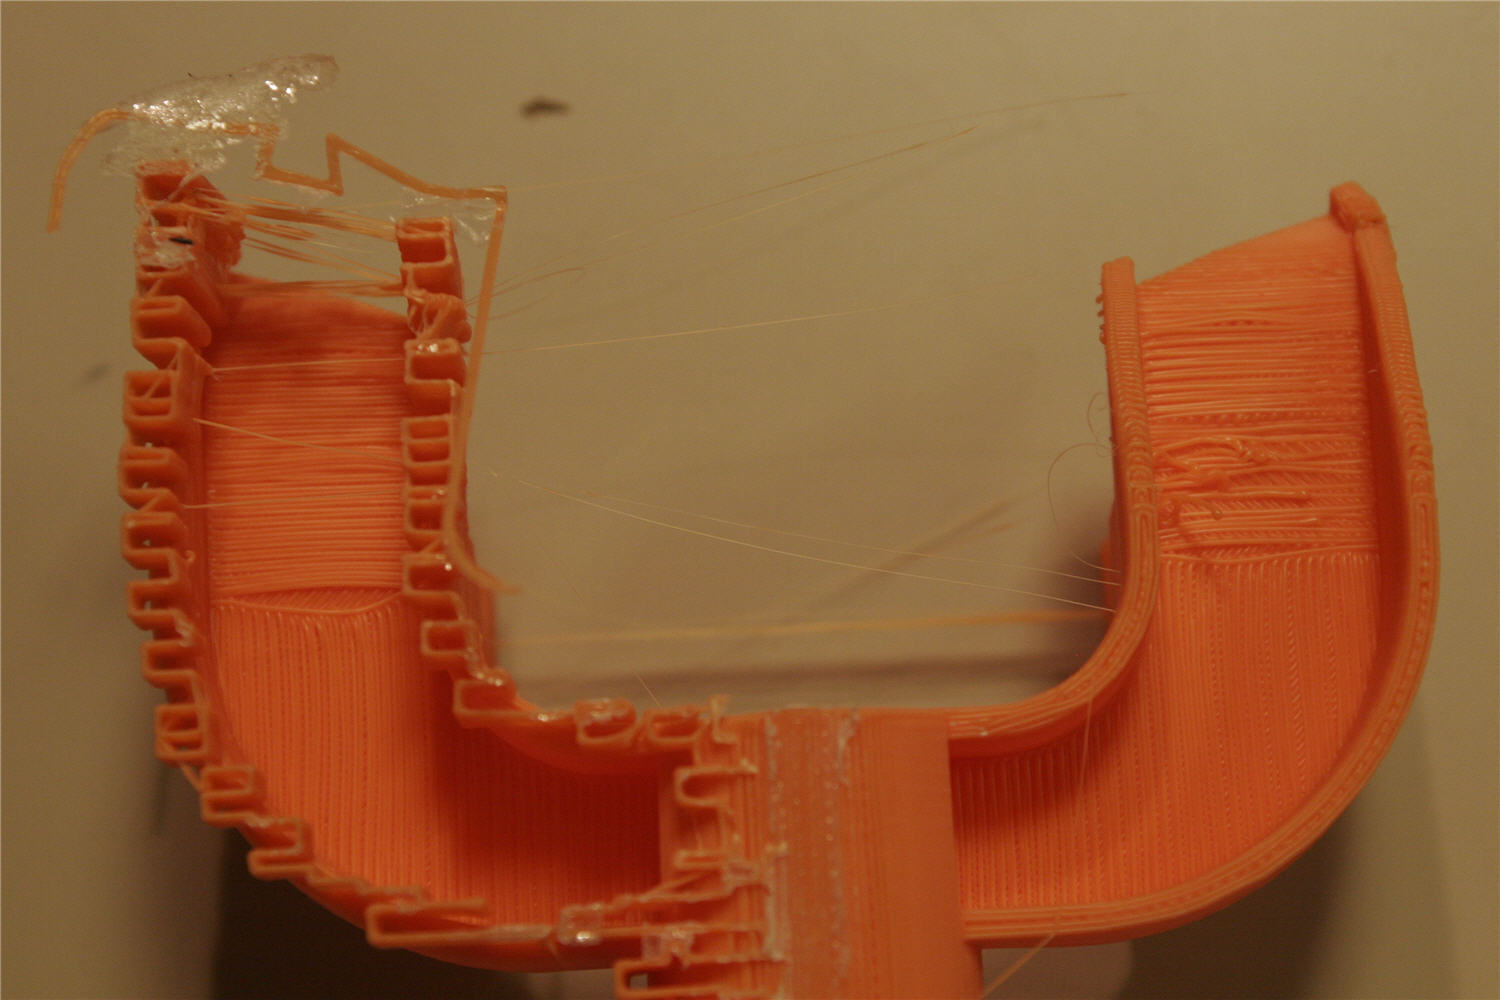
The story continues
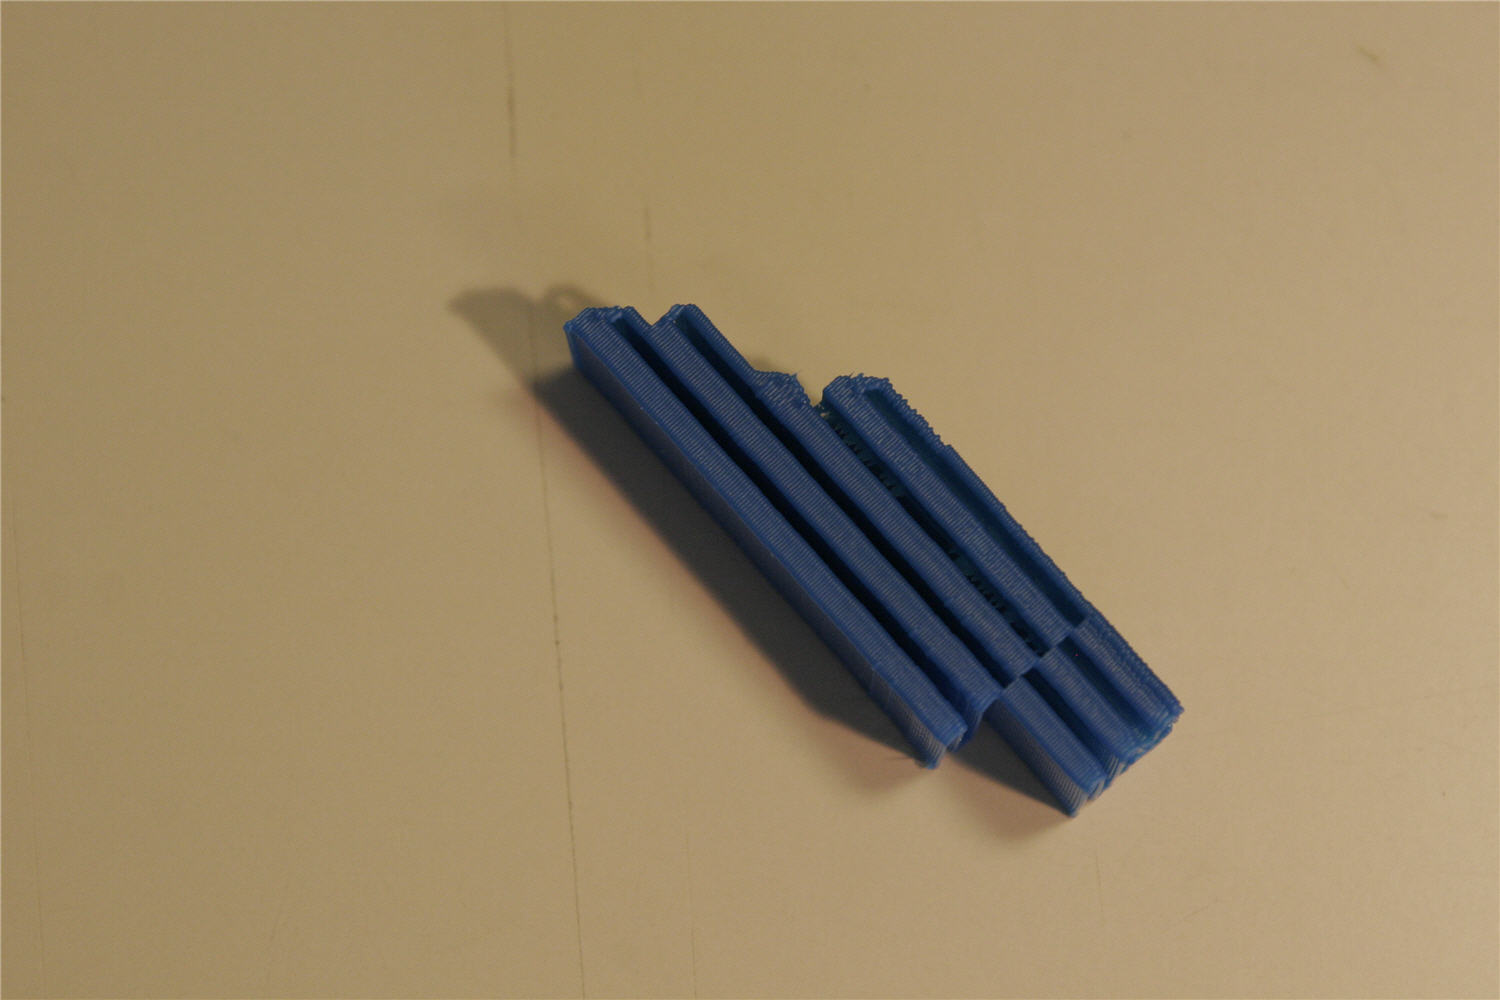
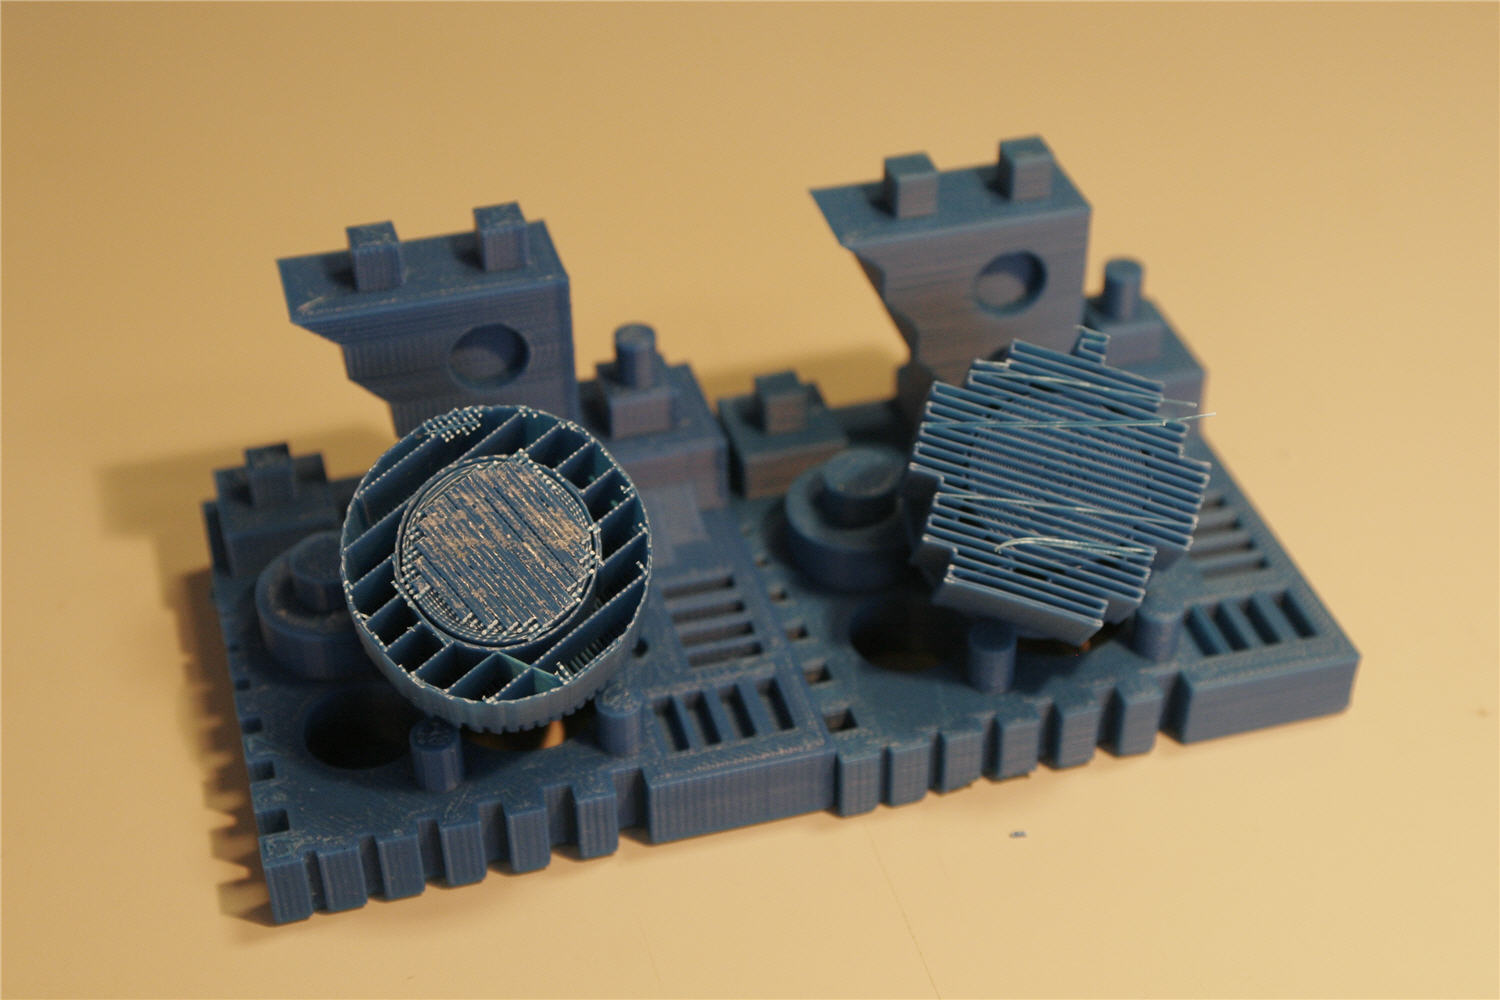
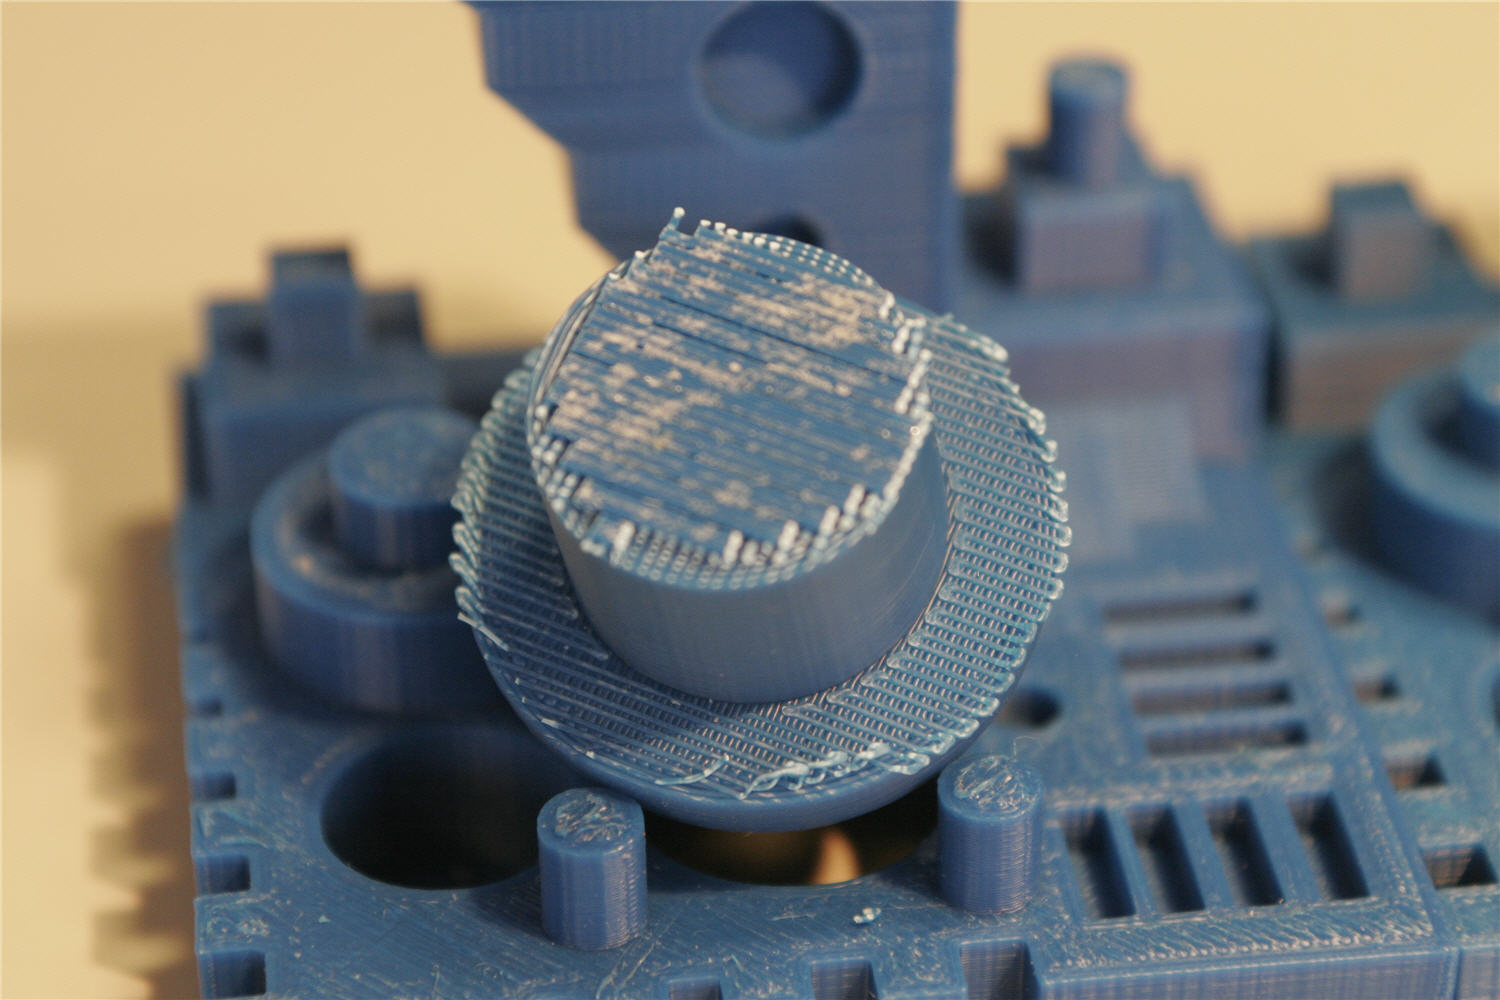
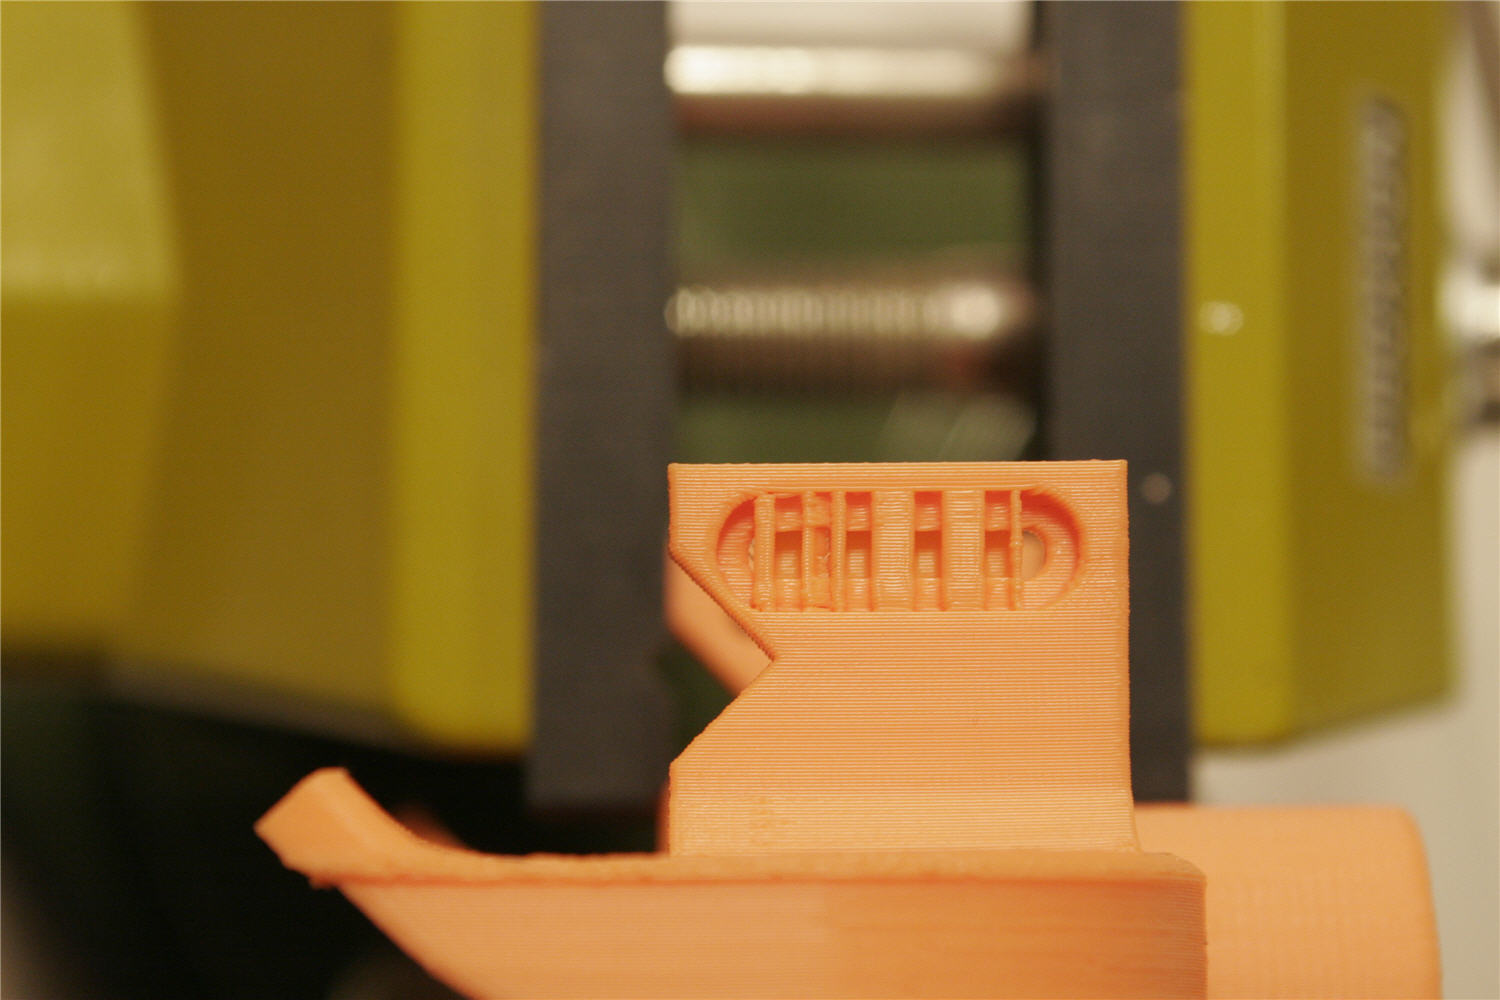
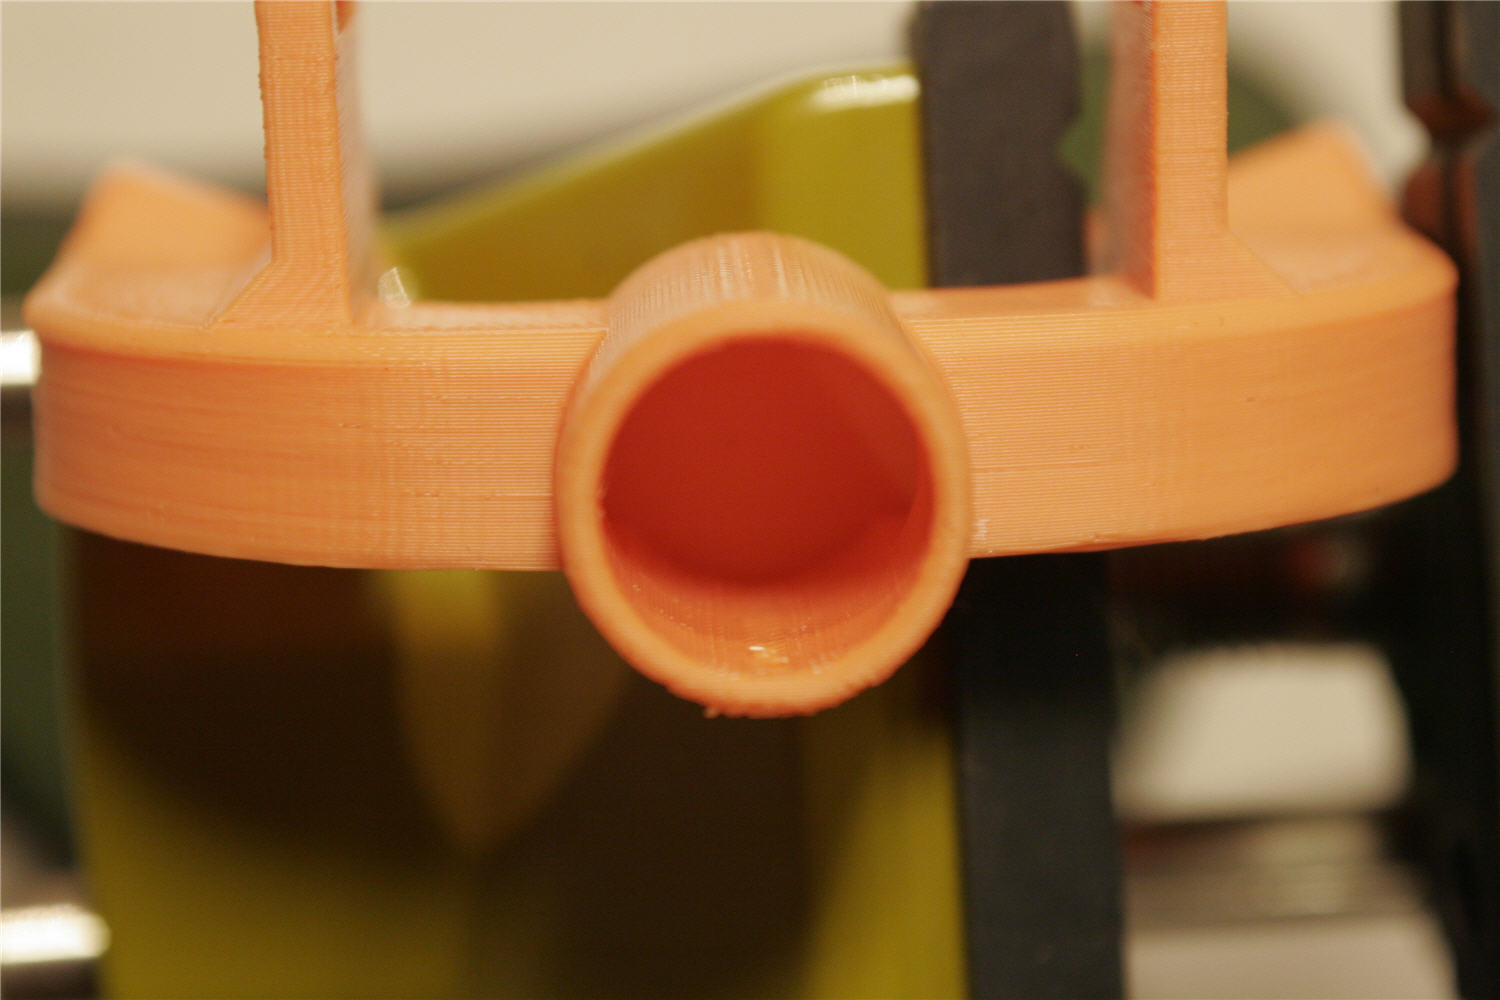
The nozzle Cooler from Festus440 is a nice object to try the custom support on. The flat parts should be printable using bridging so only support is needed under the vertical walls and in the cylinder.
The support was quite easily removed by hand and with the aid of a small screwdriver to poke around in the cylinder and the slotted mounting holes. Apart from a few spots inside the cylinder there are no markings where the support was used. In fact, the bridging is worse than the sections where support was used ...
|
|
|

|
|

|
|